We started by collecting paper and card in colours that fitted the colour scheme we wanted.
 |
I found printed scrapbooking paper, card, coloured copy paper, wrapping paper, notepaper and origami paper. |
The 30cm x 30cm (12in x 12in) format scrapbooking paper and card were needed for the largest butterflies. You could use large sheets of card or art paper instead.
Next I collected some images to make templates for the butterflies. Here are some of the links for the templates I used, but it is easy to find plenty more using a Google search (type in "butterfly image" or "butterfly printable").
I printed them in a range of sizes between a wing span of about 8cm to a wingspan of about 30cm (between about 3 and 123 inches). Some of the images are given in multiple sizes. Others I resized by choosing "scale printing" in my printers settings, then choosing different percentages for each printout.
Because a lot of butterflies were needed I made templates by gluing the printouts to scrap card (from a cereal box) and cutting them out. The template only needs to be of half of each butterfly as they will all be cut on the fold.
Next I folded paper and traced around the templates
Again and again.....
Next I cut and cut.....
I wasn't too precious about tracing and cutting precisely as the different butterflies don't need to be exactly identical.
To make the Iarger butterflies I glued together several layers of cutouts.
 |
 |
I only glued down the middle of each layer so that the edges would be able to lift up a little. |
 |
| The smaller butterflies were made of only one layer. Some of them ended up with antennae and some didn't.. |
Then came the fun bit.....
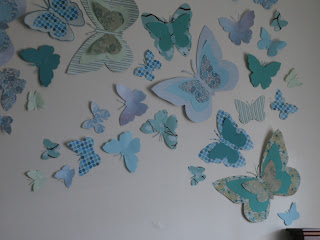
I took a packet of blu-tack and a pile of butterflies, climbed on a chair and started sticking them to the wall.
 |
| I placed small pieces of blu-tack along the fold of each butterfly so that the wings are free to stand out from the wall and create a 3 dimensional effect. |
 |
| The larger butterflies and ones cut from thinner paper need some extra blu-tack to hold their wings out, but I made sure that the wings were not flat to the wall and still arch a little. |
It helped to put up the larger butterflies first then position the smaller ones between and spreading out from them.
In Isobel's room she imagined strong design lines that we placed the butterflies along.
It took a long time to put them all up but they make a great effect now that we have finished.
As time has passed, some of the butterflies have drooped a little, but the wings can be fixed back by adding tiny pieces of blu-tack to the tips.


No comments:
Post a Comment